
Vertical Gardening with Succulents
Succulent walls are similar in construction to mosaics and are sometimes also referred to as vertical gardens. Succulent walls are pretty well permanent, being much larger, therefore heavier.
Make sure the wall you attach it to can hold the weight safely.
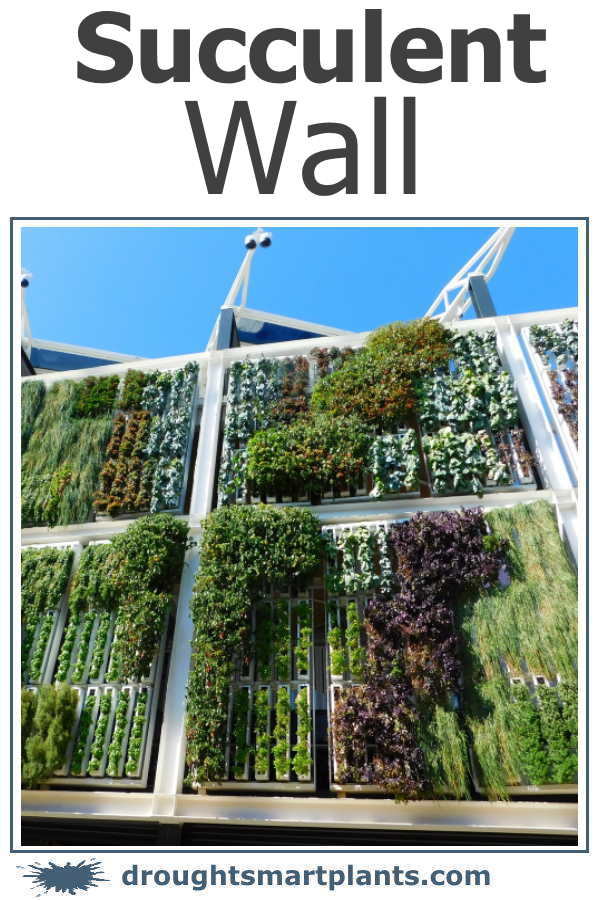
Vertical plantings are fantastic for giving a bird’s eye view of the forms and colours of many succulents planted together, from a distance resembling a landscape, fields and other topographical objects as seen from above.
In some places there are fantastic examples of succulent walls that completely cover the vertical surfaces of entire skyscrapers.
Many succulent wall projects are for outdoor use only, especially effective when placed on a garden wall where it can be viewed from a window. Sedum and Sempervivum are commonly used for these larger pieces, although in warmer climates, tender succulents such as Echeveria are grown this way.
Experiment with plants that are hardier than your zone, as they are less able to withstand cold when grown vertically or above ground.
Options for Building a Succulent Wall:
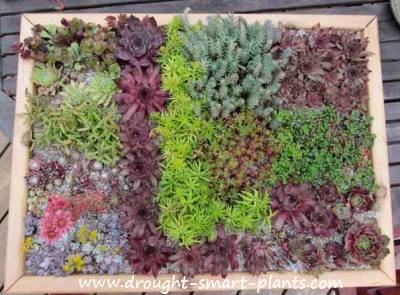
Building a succulent wall can be done in sections, using plywood backing, framed with 5-10cm lumber on the outside edges to give adequate soil depth. The frame is filled with soil, and a layer of plastic mesh or chicken wire stapled across it to hold the soil in place.
The frame of the succulent wall is filled with bare root succulent plants, and left horizontal to root. This can take several weeks for them to root enough to hold them in place.
Using unrooted Sedum cuttings or Sempervivum chicks carefully inserted through the mesh is time consuming, but very effective. The stolon of the Sempervivum will hold the chick in place until it roots, or you can use a toothpick to skewer through the base of the leaves to hold it. The plants will root quickly and in a month or so, the succulent wall sections can be carefully lifted into a vertical position on a wall or sturdy fence.
Each section can be installed in place, and if needed, trim can be placed at the intersections of each section to hide it. Eventually, the plants will fill in and become one homogenous textural wall decoration.
One of my latest Sempervivum wall projects started simply enough, but grew to encompass an area of 5 meters by 2 meters (16′ x 7′ approximately).
On this ever expanding project I poke holes into a vertical or almost vertical clay bank and insert the stolons of excess Sempervivum chicks directly into the native soil. After a couple of seasons, the roots of the original rosettes will be firmly embedded into the soil, and then new chicks can start filling in between. Eventually, it will look like a textured kaleidoscope and an incredible focal point.
Care of your Succulent Wall
The care your wall needs will depend on the size – if it’s quite large, watering will have to be from a drip line or with a misting nozzle on a garden hose.
Water well to completely wet the soil, and then allow to dry out completely. Be careful not to wash out the soil by using a very fine spray.
Fertilize sparingly with water soluble fertilizer, or compost tea made from worm castings or compost once a year.
The wall will need to be in bright light for best growth.
Tip: to check and see if there is enough light where you want your succulent wall, place a solar charging light – if it can charge up its batteries, then there’s enough light for your plants.
Best Plants for a Succulent Wall
The best plants to use for planting in a succulent wall apart from Sempervivum, are a combination of the many kinds of Echeveria hybrids and Echeveria species, a mix of other tender succulent plants like Crassula, tender Sedum, and Haworthia, or the hardy Sedum like Sedum spurium (many varieties are gorgeous in combination) and Sedum reflexum.
