
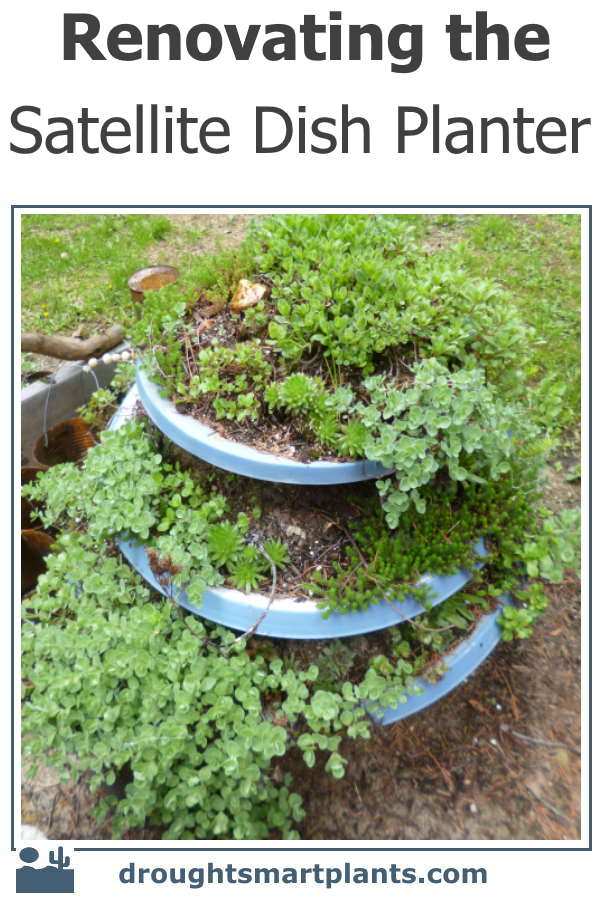
My Junk Garden
After watching it struggle along for a while, I realized it was time to refurbish the three-tiered satellite dish planter – and not a moment too soon.
Where it all began:
In the lawn, with pieces of the tree to hold up the layers, this worked for a while, but it was by no means as stable as it should be, because of the convex shape of the dishes – they’re not really round, more like oval so they’re very tippy.
From this:
To this…
It was only when it dumped out all over the place that I realized the moldy and mushroom-encrusted log holding it up was so rotten. It’s a good thing no one was standing nearby.
I decided that it should really have a better stand; luckily, there was a concrete pad that we poured from excess cement when we built our tiny house last fall. It is right in the wrong spot, but of course, it’s too heavy to move. What were we thinking?
However, it’s in exactly the right place to use as a platform for the newly renovated planter.
I leveled it off by prying up one side and shoving flat rocks under it. That was a feat of engineering because it must weigh 300 lbs, and I was alone at the time. That’s where pry bars come in handy.
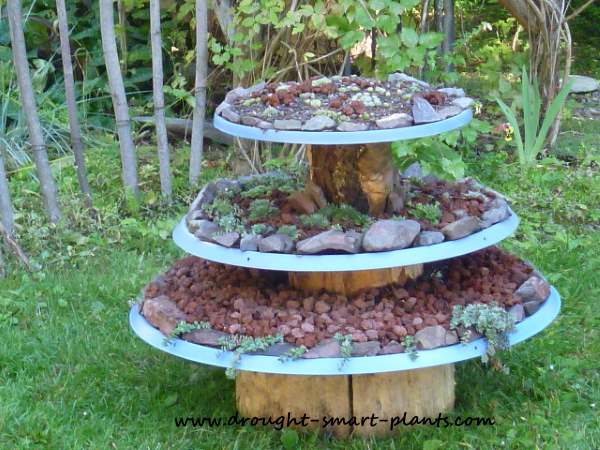
The base:
Middle…
and top layer.
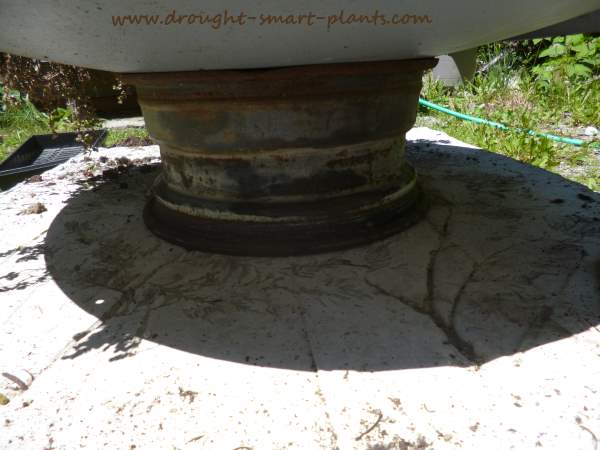
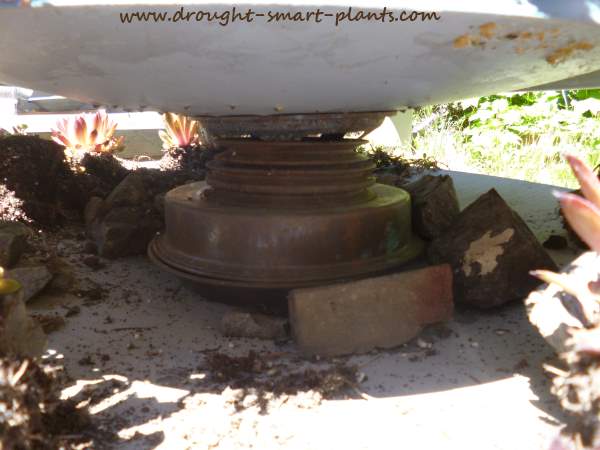
For the base, I found a truck rim – perfect; it’s got a hollow center so the curved part of the biggest satellite dish can fit into it firmly so it’s secure.
The middle one is a pulley of some kind – very thick and heavy. It wasn’t quite tall enough to have room for the plants so I placed it on a copper chafing dish that needed a home.
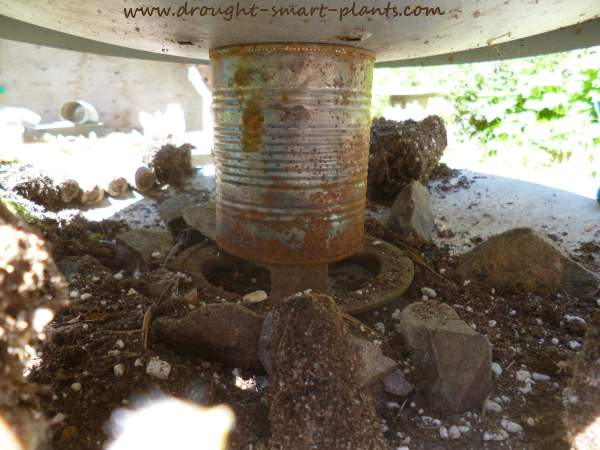
The top one is the inside part of the pulley, with a tin can (both top and bottom removed) that had been rusted in the fire.
The important part is that they have to be level and secure, so as not to fall. The weight of the plants and soil can be quite a bit when it’s wet.
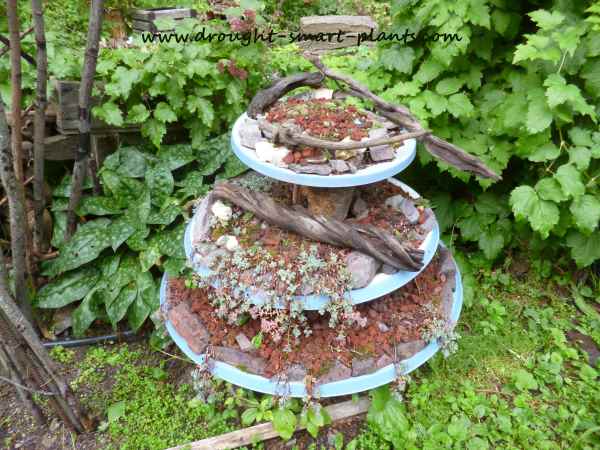
And the final result:
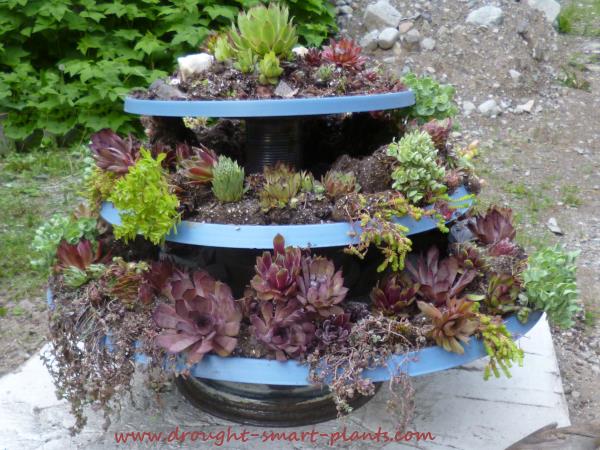
Filling in the spaces between each was fun; lots and lots of Sempervivum and Sedum drip off the edges. I think it will be so beautiful when the plants fill in a bit.
The soil I used was simply what was already in the dishes; Sunshine Mix #4 was mixed with some sandy garden soil and then mixed with the lava rock that originally was used as mulch for the dishes.
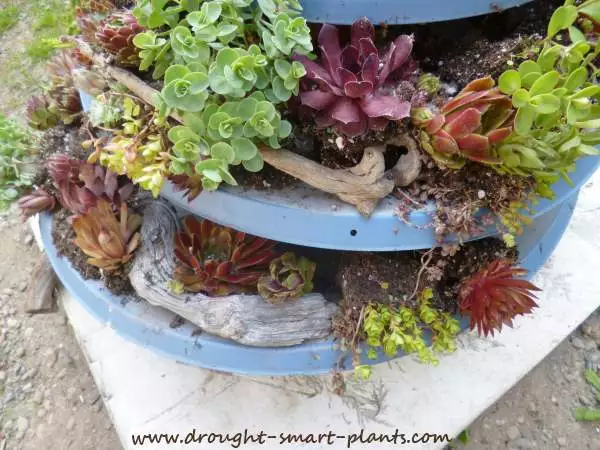
Update; 2021. I’ve discovered that many of the plants in the satellite dish planter are so tough that they survive through our snowy and cold winters.
Any that doesn’t make it is dug out and replaced.
Over the years (five at least) this has morphed into a collection of very hardy varieties of Sedum, and some Sempervivum that survives.
The hardest thing about Semps is that the roots are not as tough as the plant, and they tend to die off.
See more about preparing succulent containers for winter here.
