
Make Your Own Jade Tree Bonsai
If you’re addicted to succulents (and who isn’t?) you’re always looking for more ways to display, enjoy and utilize their unique characteristics.
I make lots of succulent crafts such as mosaics, tapestries and many hypertufa crafts to plant with Sempervivum, Sedum, Echeveria, Crassula and many other gorgeous low maintenance plants.

This article will give you inspiration for yet another craft – albeit one that is completely different than all the other ways to display succulents.
Using some of my favorite Crassula in a completely unique way – luckily, they’re very forgiving – you really can’t avoid making a great little tree like form that is both charming and fun.
I’m talking about Bonsai, of course. This ancient Chinese (Pen Jing, or landscape) and Japanese (Bonsai) art of duplicating the wild trees growing naturally in cliff faces, or other very challenging environments goes back centuries.
Many venerable Bonsai trees can be passed down for many generations in a family and are revered and admired by collectors.
Crassula, the Jade plant, is particularly great to use for Bonsai, with its tree like form and ability to withstand considerable rough treatment.
There are several smaller versions of Crassula that work well, and other similar plants like Elephants Food, with their rubbery stems and tiny leaves.
How to start your Crassula Bonsai:
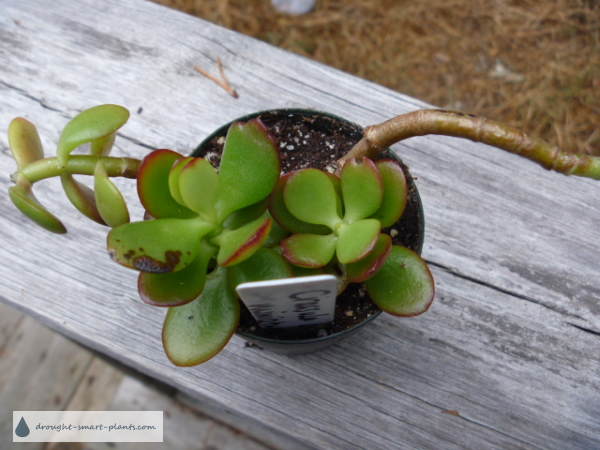
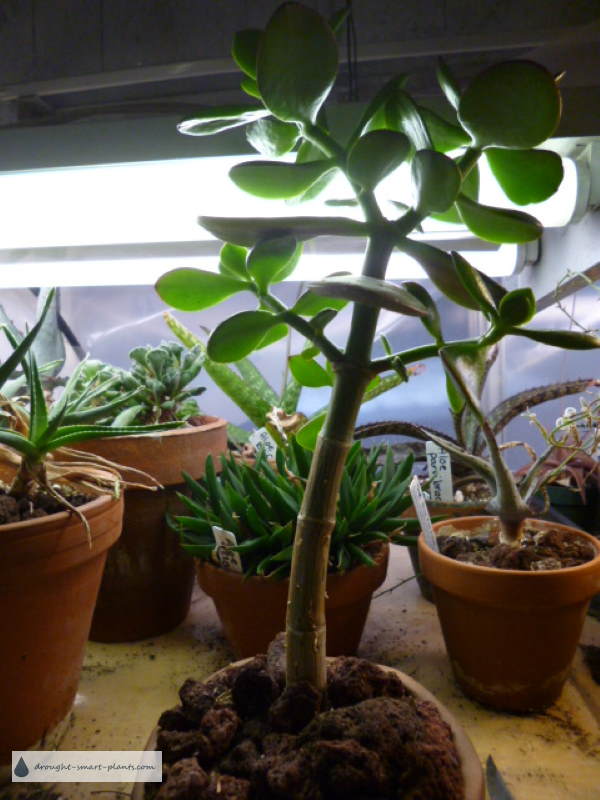
I find a very root bound specimen, preferably one that has been in the same pot for several years, and is around 20cm (8″) tall.
It can be a single stem, or branched – each of these forms will give a different effect.
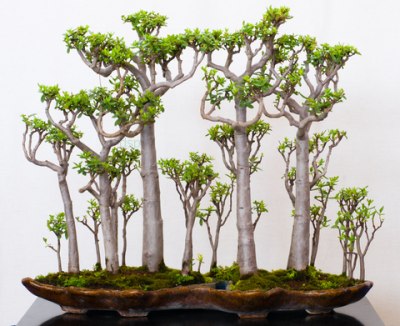
Several cuttings potted together can make a raft style, or clump. In time, this will give the impression of a tiny forest in a pot.
Essentially, Bonsai is performed by constant pruning and pinching of the new growth, each time forcing more branching.

Any branches growing directly up or directly down are removed.
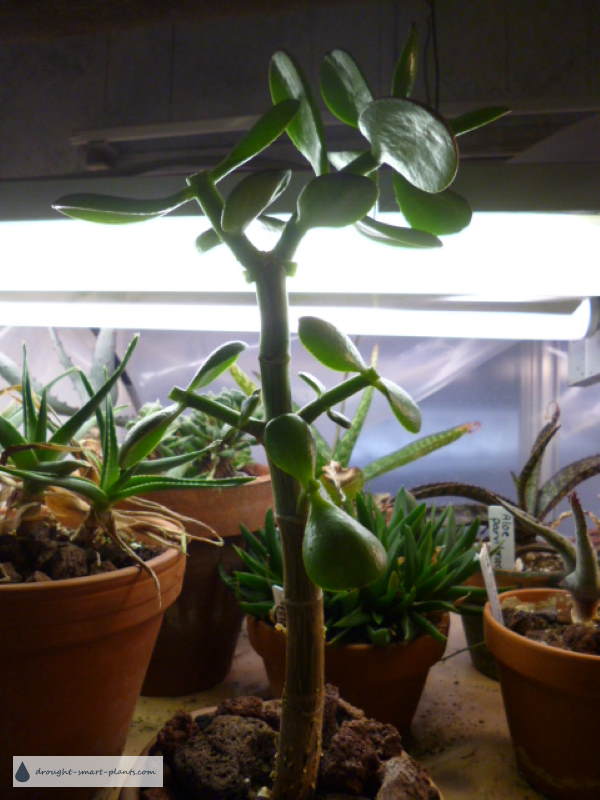
In the case of the Crassula ovata cutting shown here, the leaves are almost all taken off – where each leaf was, a new cluster of leaves will emerge, and can be trained as a new branch.
The top was also pinched to encourage new buds to break below.
Eventually, with every successive pruning, the leaves get smaller, and the tree takes on a gnarled ancient appearance. There are rigid rules for making real bonsai out of forest trees, but with succulents, I don’t feel the need for such restriction.
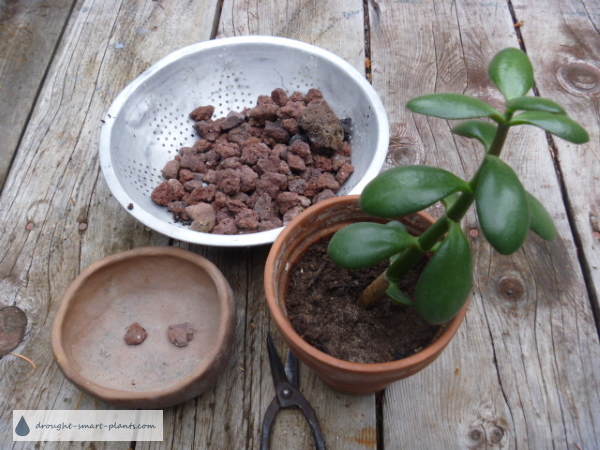
Pot into a shallow, bonsai pot with drainage holes – these may require wiring to hold the plant in place.
Watering and pest control are of course still carried out, as you want a healthy plant, not a sick one.
Thorough drenching, wetting all the way through the root ball, and then allowing the soil to dry out is essential to Crassulas well being.
Occasionally, fertilize with water soluble fertilizer, or sprinkle some worm castings on the surface of the soil.
Root pruning, or removing some of the larger roots can be done each season, which will trigger the growth of more fine roots.
Other ways to make your Bonsai succulent look old:
Wire the branches so they drop down instead of remaining upright – use care that the wire doesn’t cut into the stem, and remove it as soon as the form has set.
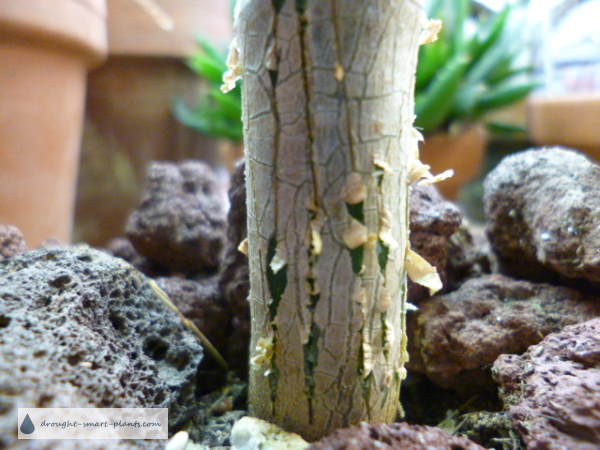
Another treatment that increases the look of venerable old age is to scar the trunk – running a thin knife blade or razor blade up and down to make small slits will make the trunk look old and bulk it up.
Take a small wire brush or other sharp object (small nail, metal comb, piece of wire) and brush it up and down the stem. Scarring the bark will make the stem rough and give the impression of great age once it heals.
In time, this will thicken the lower part of the trunk to make it look even more aged.
Caution; you are opening up the plant, so make sure that your implement is clean (use isopropyl alcohol to sterilize it). You don’t want to introduce pathogens to the inside of the plant.
There are many different Bonsai designs that you can make – here are a few:
- Single upright form, very traditional and formal
- Leaning to one side, sometimes with roots exposed
- Growing as though in a cliff face, leaning or even cascading
- A group of different sized plants arranged like a little forest or grove
Luckily, Crassula especially are really easy to propagate – short cuttings of several leaf nodes will root in weeks, and be ready to start making into a Bonsai in a few months.
Training of these fascinating little trees is ongoing and a valuable lesson in patience; the Zen appeal of growing your own little forest? Priceless.
Bonsai with Jade Plants; the next stage
As your bonsai Jade plant gets bigger, you’ll prune it – this essential step keeps the shape of a tiny tree in miniature.
Each time you pinch off new growth, the plant will put out more, smaller leaves. Over time, the branching structure gets finer, the leaves ever smaller.
It seems like a lot to take off all at one time, but don’t worry, the plant will quickly make more growth to fill in the gaps.
See more great pictures of another great candidate for indoor bonsai, Portulacaria afra.
How do you make the leaves of a bonsai Jade smaller?
So, you’ve got a good start on your tiny tree, the branches are all in the right places, but it looks so out of proportion because the leaves are so huge!
There is an easy fix for this, but it takes a while for the plant to recover – only use this technique on a healthy plant, that is actively growing, or you risk killing it.
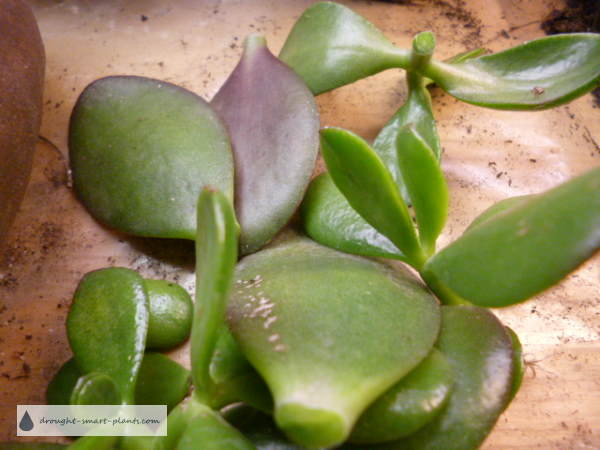
Carefully cut the leaves off at the base leaving only the tiniest portion right next to the trunk.
New leaves will emerge within a month or two, which will be smaller than the original ones. I generally recommend not simply twisting the leaves off as you do to propagate them, because sometimes this doesn’t trigger the growth spurt of the new leaves.
The tiny piece of petiole (leaf stem) will fall off in time.
Once you’ve done this, it’s a good time to move the plant into brighter light, if you wanted to move it, but don’t want to let it get sunburned.
